The newest member of our family!

Hi everyone! Sorry it has been so long since I posted but I have been spending all my time taking care of this little guy.

untitled-140-2

Colton Edwin Moss was born on December 23, 2012 at 6:27am weighing 7lbs 5oz and 20.5 inches.

He is the best DIY project we have created yet 🙂 However, taking care of a newborn is legit and I have been spending the last 10 weeks trying to figure him out. He is super fussy and does not like to sleep so it has been a hard adjustment but I know he will get better with time. I just wish I knew when I was going to get some more sleep…

For those that are wondering, he looks just like me! Here is a pic of our little family (sorry for the lack of makeup- it is a big deal if I get a chance to shower every day ha).

DSC_0140 (2)

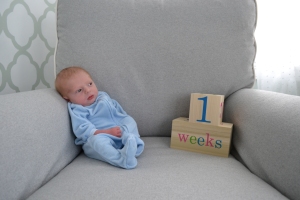
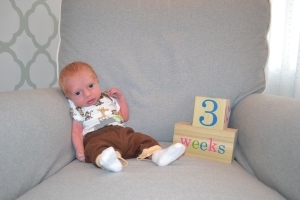
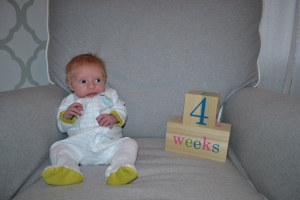
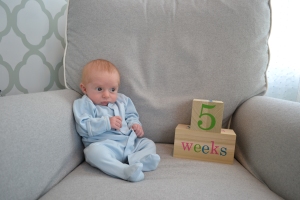
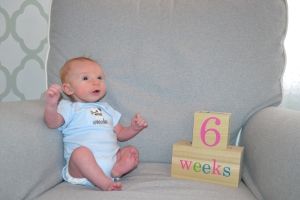
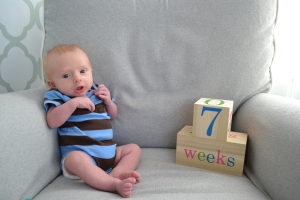
He has grown so much since we brought him home 10 weeks ago! Below are the weekly photos I have been taking of him to show how much he has grown, Enjoy!

1week (11)

2weeks (12) 3weeks (4)

4weeks (5)5weeks (8) 6weeks (10) 7weeks (4) 8weeks (6) 9weeks (4) 10weeks (15)

Elephant canvas and nursery picture wall

Baby Moss will be here before we know it so I wanted to give you a few nursery updates. The nursery is all done now but I am going to wait for the final reveal until he is born and we can put his name on the wall to show you all 🙂

He is due on December 16th so less than a month! Here I am a few days ago:

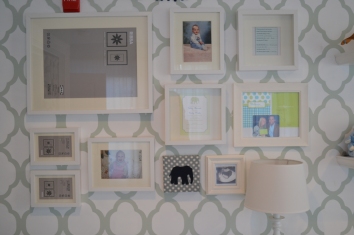
One project I knew I wanted to do in the nursery was a picture wall. I wanted to include a picture of Nick and I when we were babies along with some pictures of our little one, once he arrives.

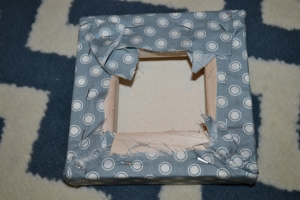
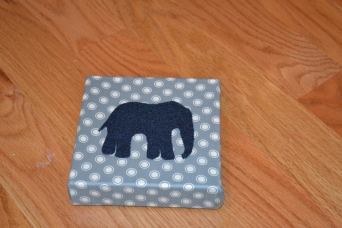
I also wanted to add some DIY artwork and decided to use a small canvas and felt to make an elephant art piece.

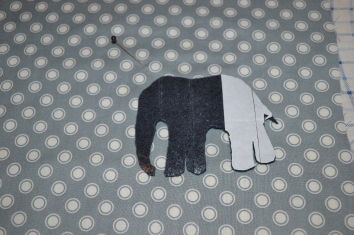
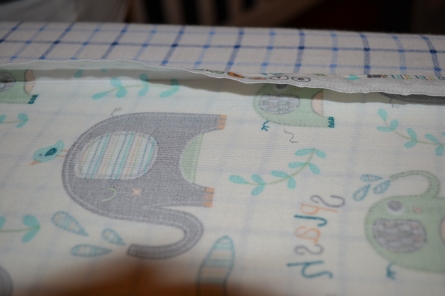
I used my iron on hem tape left over from the nursery closet curtains to cover a large area of my felt. That way, when I cut out my elephant it would all be covered with the hem tape and ready to be ironed on to my fabric. Felt is flammable so I had to use a rag in between the felt and hem tape and the iron. After the hem tape was adherred, I used a clipart picture to cut out the elephant on the felt.

I then cut out a piece of fabric slightly bigger than the canvas so I could wrap it around. I then iron the elephant onto the fabric (using a rag in between again). But first I had to take the paper off the hem tape before ironing on the elephant.

After I ironed on the elephant, I then stapled the fabric around the canvas.

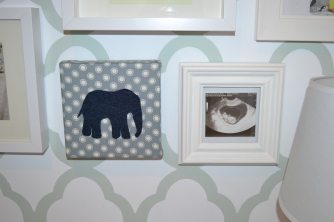
Here it is finished:

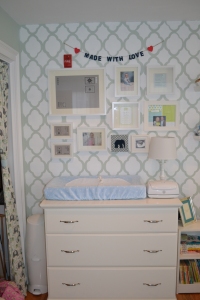
And here it is up on the photo wall above the changing table/dresser.

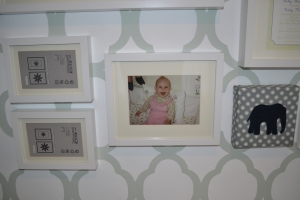
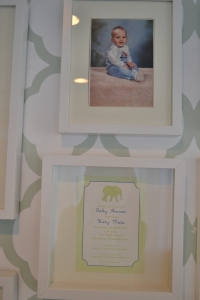
This is a picture of me when I was a baby.

And baby Nick and my shower invite

This is the first ultrasound we got of baby Moss at 8 weeks

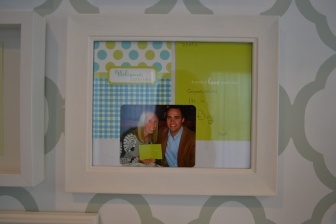
When Nick and I went to the doctors to find out the sex of our baby, we had the technician write the sex in a card. We then sealed it and opened it at dinner that night. We wanted to find out while out on a romantic dinner rather than when we were at the doctor’s office. Below is the card framed and a picture of us after we opened the envelope to find out we were having a boy!

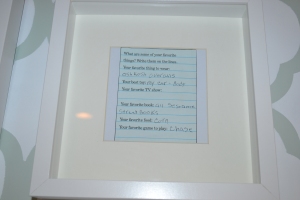
I also framed a page from a book that Nick’s mom filled out for him when he was a kid. I thought it would be cute for Baby Moss to see what his daddy liked when he was a kid.

We also left a few frames empty for pictures of the babe when he arrives. Here is a picture of the whole wall. The ‘Made with Love’ sign was a gift from my grandmother. It was originally pink and aqua so I just painted the wooden letters navy to match the rest of the nursery. I love how the wall came out! What do you think?

Quick weekend project: Guest bathroom

Nick and I have been wanting to redo our guest bathroom for a while now. When we bought our condo we were told we could only choose 3 paint colors with no additional cost. We choose a light beige for the living room, half bath, guest bathroom, and the 3rd floor since they all flowed together and a light blue for the master and a light green for the guest room. We love the color in all the rooms except the guest bathroom. Since there are no windows in that bathroom, the color tended to look more orangey than we wanted. We have talked about repainting the bathroom for a while but painting is not our favorite thing to do especially after my month-long stripe hallway project and 10 hour plus nursery stencil project. Needless to say, I did not want to paint again for a long time.

So when Nick offered to do most of the painting, I was on board! A few weeks ago we took a trip to Ikea to get some things for the nursery and to get our supplies for the bathroom. The Home Depot was right next door so we got some paint and shelves and then started our weekend project. We wanted the bathroom to feel much lighter so we ended up getting Behr Ice Cube which is a light mint green.

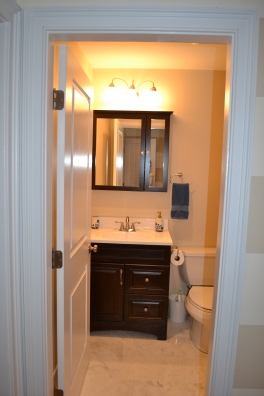
In the before picture below you can see how the lights made the room look orangey. The shower curtain and accessories were from Target. For our wedding we registered for white and blue towels so when I was first buying accessories for the guest bathroom, I wanted to find a shower curain that would go with the blue towels.

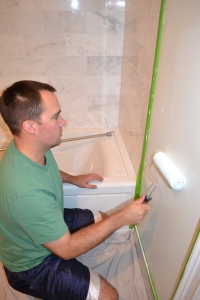
We started the project by putting painters tape around the bathtub, the door, the trim and vanity. We couldn’t put tape on the ceiling since we knew it would peel off with the tape since it happened with our stripe project and the nursery stencil. I ended up just cutting in with a paint brush before Nick got in there with the roller.

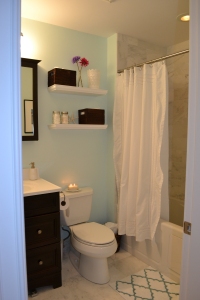
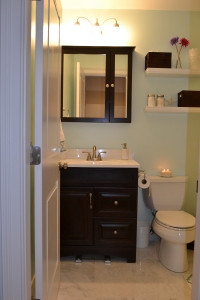
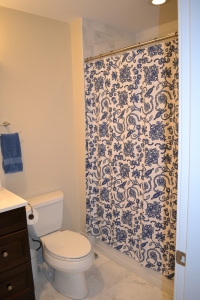
And here are the after pictures. We moved the hand towel hook to the other side of the medicine cabinet and bought some smaller floating shelves from Home Depot for more storage. This is the bathroom that our baby will use along with our guests so we knew we needed some more storage. The shower curtain we got as a wedding gift but never used.We took a trip to Target to get a new floor mat, soap dispenser, toothbrush cup, and small baskets for the shelves.

The baskets have extra hand towels and washclothes. The Mason jars are left over from my sister’s wedding and have cotton balls and qtips. We got the clear vase, fake flowers, the candle holder and tall white vase from Ikea.

This is the small wall across from the toilet. That picture was actually in the bathroom that my brother and I shared in middle school and high school and then Nick and I had it in our last apartment together.

We love the transformation! It makes it look a lot bigger and brighter. We still can’t believe how a can of paint and some new accessories completely changed the room. What do you think?

BEFORE:

AFTER:


Linking up here:

Beneath my Heart- Best DIY projects of October

Nursery closet curtains

Hi everyone! I am back with some nursery updates. We have been working hard on the nursery since our little baby will be arriving in 2.5 months! I can’t believe how soon he will be here!

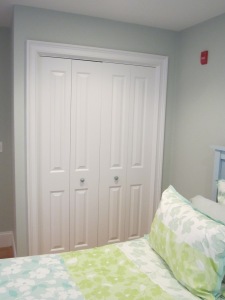
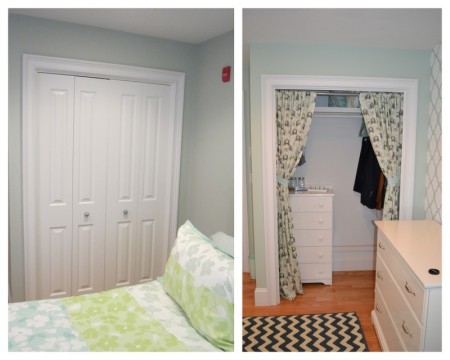
One project I knew I had to tackle was the closet in the room. The closet originally had bifold doors but because we needed to utilize every inch in the room for nursery furniture, I wanted to replace those doors with curtains so we wouldn’t have to worry about leaving a few inches for the doors to open. Plus I thought it would be a good way to bring some more pattern and color into the room. Here is the closet before when it was still a guest room:

The colors of the nursery are going to be green, grey, navy and aqua. We also decided to do a elephant theme for the nursery so when I found some elephant fabric at JoAnn Fabrics that had those colors and some elephants I knew it would be perfect for the closet curtains.

I got the idea for closet curtains from Young House Love and since I don’t sew, their no-sew instructions were very helpful. We started by installing a closet rod which I found at home depot, I wanted to make sure to use a rod that was screwed to the wall because I was afraid a tension shower curtain rod would fall. After the rod was installed, I measured the height of the closet to see how long the curtains would need to be and added 1″ on each end for the trimming and 3″ on top for the rod pocket. For the width, I just used the full width of the fabric which was around 43″ and made sure to get enough fabric for 2 panels (instead of cutting the width in half). I ended up with two 86″ panels.

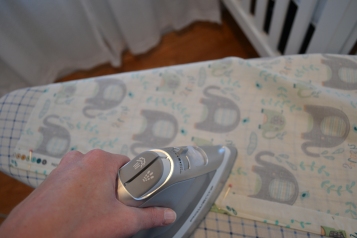
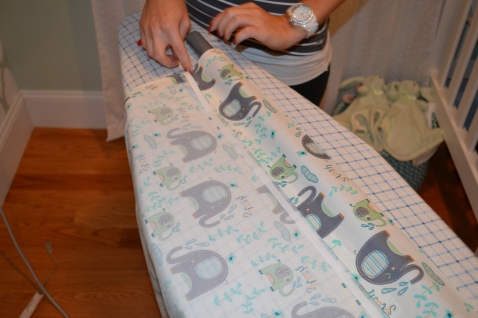
The first step was to use Heat N’ Bond iron on hem tape to make a clean-looking edge on the long sides of the panel. Since I used the width of the fabric, I just measured an inch down the whole panel and used sewing pins to give me an idea of where the edge would be. After putting the pins in, I ironed the sides and took the pins out so I would have a crease to work with. (Note: I had my crafty friend Lauren come over to help me out with this project)

The crease after the pins were ironed and removed:

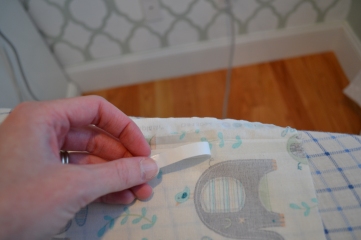
I then put the Heat N’ Bond hem tape under the crease and ironed it first to the panel and then took the white paper off and ironed it to the to the creased piece of fabric.

Step 1: iron the tape to the panel

Step 2: take the white paper off and iron the fold down

I used this same method for all the long sides of the panels along with the top and bottom edges of the panel. The last step was making the rod pocket so it would hang in the closet. For this we measured 3 inches from the top edge in order to accomodate the rod and then we used more Heat N’ Bond to make the pocket.

It was now time to hang the panels! Please excuse the awkwardly placed bookcase, we were still working on the layout of the nursery furniture.

I LOVED them!!!

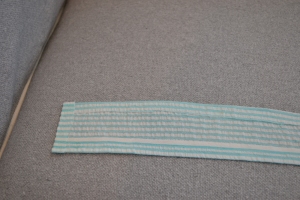
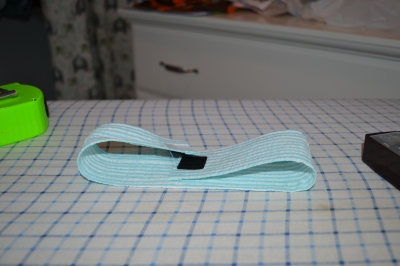
I wanted the panels to be pinned back so I could see everything in the closet and not have to open them everytime I went in there. So I made 2 loops out of some leftover seersucker fabric (from a no-sew pillow project I will show later) and used some more of the Heat N’ Bond hem tape.

I then used some velcro squares to close the loop around the panels.

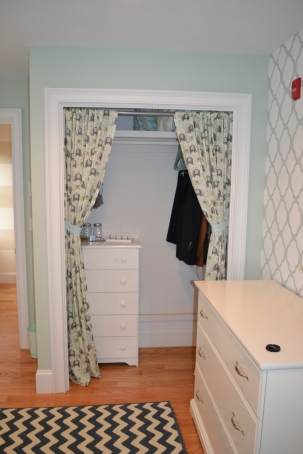
And here it is finished!

Before and After:

As you can see on the right side of the closet we have to keep some of our clothes in the closet since we don’t have any room left in our closet but we still have plently of room for Baby Moss’ clothes.

Hope you like the curtains as much as we do!

Nursery stencil

I am slowly starting to work on the guestroom-turned-nursery now that we are getting closer to d-day. The first DIY project I wanted to get out of the way was stenciling an accent wall on the far wall. I have seen so many other bloggers do stencils in their home so I wanted to try it for myself.

The walls of the guestroom are green (we chose this color before we moved in knowing that we wanted it to be a kids room down the line) so I wanted to do the stencil with white paint. I am planning on bringing a lot of patterns and colors into the room so I didn’t want the wall to be too busy with multiple colors.

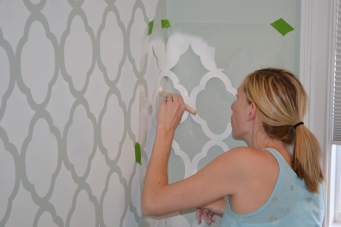
I bought a stencil from cuttingedgestencils.com along with their stencil kit which included a small brush, a foam roller and a stencil level that attachs to the top of the stencil. The level helps to make sure that your stencil is straight throughout the whole wall.

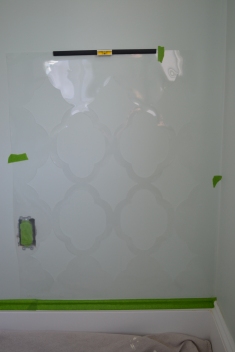
Here is the wall before the stencil:

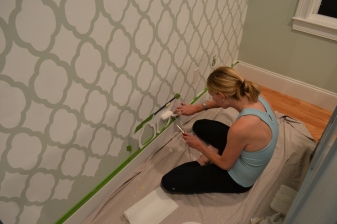
The first step is to use painters tape to tape off the baseboards, ceiling and side walls that you dont want stenciled. Since we have had problems with the paint on our walls being pulled up with painters tape (read about our stripe project here) I had to be really careful around the side walls and ceiling since I didn’t want to use painters tape on those walls. The next step is to use painters tape to tape the stencil to the wall making sure it is straight with the stencil level.

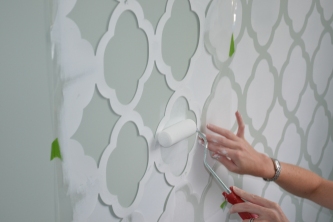
It is then time to paint, the trick to painting an even coat on the stencil is to get the roller completely coated in the paint and then roll it over a paper towel to dry out the roller a little. Too much paint on your roller will cause the paint to drip through the stencil. You want to use a paper plate as your paint tray so you don’t get any bumps or texture on your roller like you would with a regular paint tray.

Then it is as simple as rolling a few coats on your stencil.

Because I was painting white on top of green, I had to do a few coats to make sure the green wasn’t showing through.

Another great tip that I got from other blogs is to use baby wipes to clean up any paint that might have dripped through. I had baby wipes by my side the whole time to help clean up any excess paint.

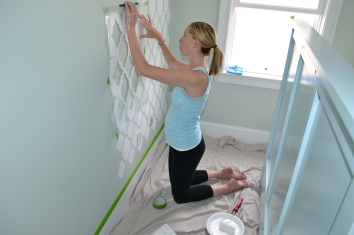
After I completed each stencil I just lifted the painters tape and moved the stencil up or over to continue the pattern. The key is to line up part of the stencil with what you already painted and use the level to make sure it is straight. In the picture below you can see I am overlapping the pattern from below and on the side to make sure the patterns continues smoothly. I had to clean the stencil after 4-5 times because then the paint started to build up and effect the pattern.

For all those worried- I had all 4 windows in the room wide open to keep it ventilated so the fumes wouldn’t harm me or baby M. However, I chose the wrong day to do this because it was also about 90 degrees out but I survived and I made sure I was very hydrated.

The middle section of the wall was the easiest because I just had to move the stencil around, it was the edges, the top and bottom that took patience. I had to bend the stencil in order to continue the patterns on the sides. I used the small brush that was in the stencil kit to complete those corners because it was almost impossible to get the roller in there without getting paint all over the adjoining wall.

The stencil also came with a smaller panel that made it much easier to complete the bottom and top of the stencil.

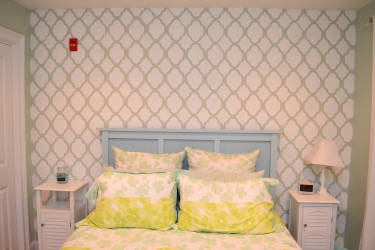
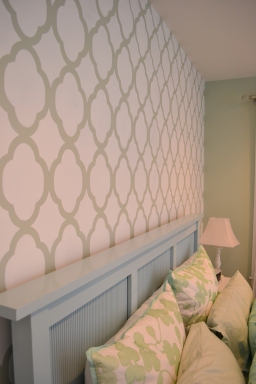
And now for what you have all been waiting for… the FINISHED wall:

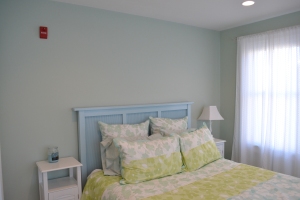
It was hard to get a good picture of the whole wall since we still had the queen size bed in there but here are some pics when we put the bed back. I also completed that last little part of the stencil at the top of the wall after that picture was taken. I was so tired of stenciling that night, I didn’t think it would bother me if that little part was not completed. But I am Type A and it was annoying me for weeks so one Saturday I got all my stencil stuff out and completed it. It was probably the hardest section to do out of the whole wall but I love the completed look. Sorry for the lighting I took these pics at night with my extra flash so it’s not all true to color.

The wall probably took me 11 hours total and it is definately not perfect (please don’t come over and look too closely) but I love it and I hope our baby will too. I plan on putting the crib and possibly the glider on this wall but we still need to figure the baby furniture.

Hope you like it as much as we do!

It has been forever!

Hi Everyone!

I am so sorry for being MIA for the last 2 months! Summer has been busy and we have been traveling and enjoying the nice weather!

Here are some hilights from the last few months:

We spent Memorial Day in New Hampshire:

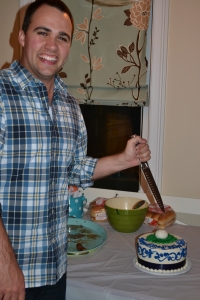
Had a birthday party for Nick at our condo:

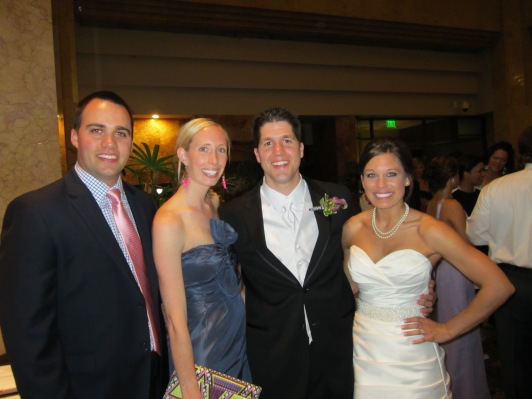
We went to our neighbors wedding in St. Louis. They moved to Boston after college but went to school together at St Louis University, it was fun to see a new city! We had a blast and are so lucky to have such amazing neighbors!

We spent July 4th in New Hampsire on the lake with our family and friends.

The weekend after the 4th we had an engagement party in NH for our friend Carter and her new fiance Bryan.

The happy couple and all our friends from New Hampshire at the party:

And last but certainly not least… we told all our family and friends that we are expecting our first baby!

We found out the sex by going out to a nice dinner and opening a card we gave the nurse to write down the sex. We both thought we were having a boy so we were very thrilled to find out we were right!!

I am 20 weeks now but this is what I looked like 2 weeks ago. I have been taking pictures throughout my pregnancy so I will keep you updated as I grow!

Hope you all enjoyed my blog catch-up. I have many DIY projects in the works for the nursery so I will be updating the blog a lot more often! Thanks for following!

Patio furniture

Hello everyone! Sorry it has been so long but we have been busy traveling, working and enjoying the nice weather!

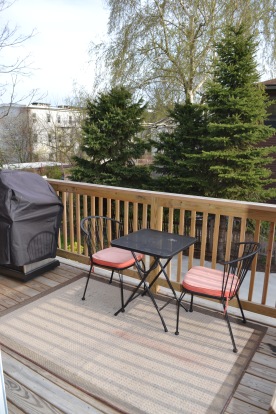
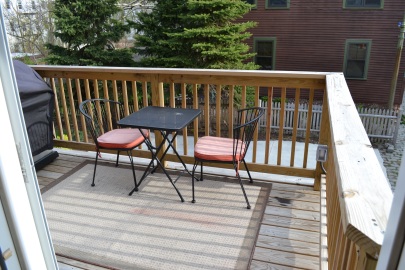
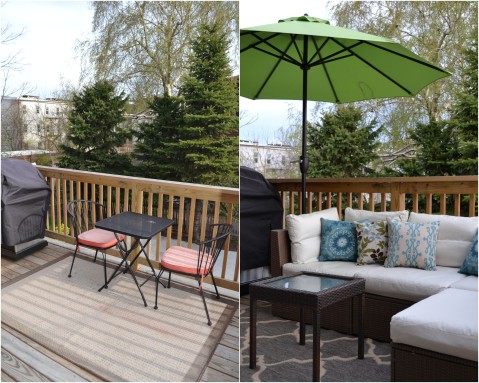
I wanted to update you on our outdoor porch since it is officially summer and we will be using it a lot more over the next few months. When we moved in about a year ago we just brought over the outdoor rug and small table and chairs that we had at our old apartment. It was perfect for when the two of us just wanted to have dinner and drinks outside but was not ideal for when we had guests come over.

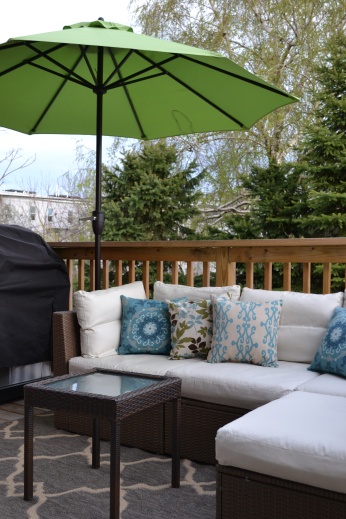
Last summer we brought out the bench and chairs from our dining table to allow for additional seating. It worked for a while but I really wanted a sectional so we could use the most out of our small deck and fit as many people as possible.

Here is what our deck like before:

We had been looking online at different sectionals but they all ranged anywhere from $1200- 2500 and we were not looking to spend that much money. So when Nick came home from a night at Mohegan Sun with $800 he had won while playing craps, I knew that money was going towards some new furniture! Nick did some more research and found a sectional that would fit on our small deck for only $700 from Ikea. We made sure it was in stock at our Ikea and took a drive.

Thankfully we had my parents Tahoe that weekend because otherwise it would never have fit in our small car. We also stoped at Target to pick up a new outdoor rug, a small table and some colorful pillows since the Ikea sectional was a light tan color.

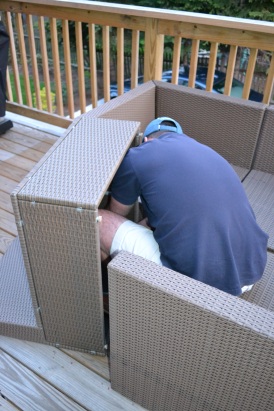
When we got home we started putting together our new furniture. There’s the hubby putting together the middle piece.

The best part was when we were putting away our old stuff and our neighbor across the way happened to be outside and asked if we were selling it. We told her we were planning on either giving it away or selling it for $20 on craigslist since we got it from Bed, Bath & Beyond a few years ago. She said she was looking to buy the exact set and wanted to give us $40 for it, she would not listen when we told her she only needed to pay $20 so we were pretty happy about the sell!

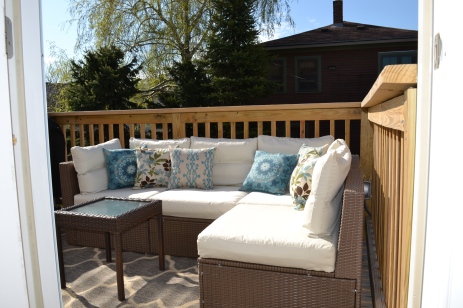
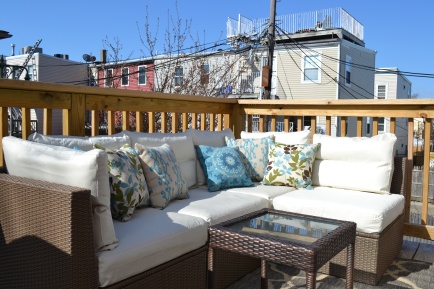
Here are some after pictures:

 The next day we went to Lowe’s and bought an umbrella since there is no shade on the deck. I am as pasty as they get so I need some sun protection!

Now for the side by side picture:

What do you think?

We have already used it a bunch and we plan on having friends over all summer!

Hallway Lights and Hallway Final Reveal!!

When I decided I was going to update our hallway I knew the builder-grade ‘boob’ lighs had to go. I found a few ways to update ‘boob’ lights – as they call them in blogland- but I thought the way John and Sherry from Young House Love did it would work for our space.

We basically just took off the glass pendant and used the rest of the hardware to hang some drum shades.

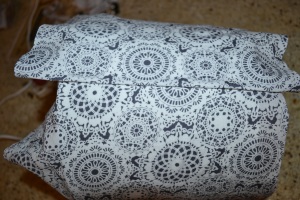
However, I didn’t want just white drum shades so I covered them in fabric. I found some grey patterned fabric that would tie into the valences at the end of the hallway.

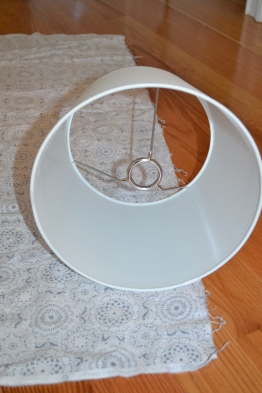
I followed these instructions and started by turning the shade on its side and matching up the seam of the shade to the beginning of my fabric like this

Then I drew a line an inch and a half from the top and bottom of the shade to give ample fabric to work with

Then I rolled the shade over and over and continued drawing the line top and bottom until the seam of the shade came back around. I then had my fabric template that I used to cut the other 2 pieces of fabric since I had 3 light fixtures.

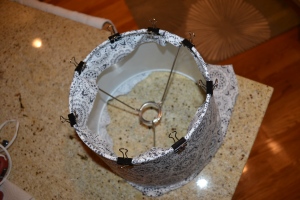
Then I used my hot glue gun to glue the end of my fabric to the line of the seam of the shade leaving the excess fabric at top and bottom. I then used small binder clips to wrap the fabric around my shade on one side:

I then brought my shade outside and used spray adhesive to attached the fabric to the shade. I just lifted some of the fabric from the bottom (the part that wasn’t clipped down) and light sprayed the adhesive and then smoothed out any kinks. After the whole shade was sprayed I brought it inside and hot glued the end of the fabric by folding over the excess fabric and making it look cleaner:

I then added a small amount of hot glue right at the base of the wire frame on the top and the bottom and immediately folded over my fabric. I pressed down into the nook of the wire frame and held until secure and the glue started to cool

When the glue was dry, I cut the access fabric from the top and the bottom:

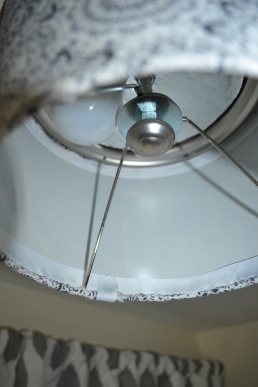
I then glued white ribbon along the fabric to make it looks more seamless.

This is what it looked like from the inside when I was done with the ribbon.

I then used the existing rod from the ‘boob’ light to attach the drum shade. I had to add a washer and 2 nuts in order for the shade to fit on there properly but it worked out great. Again- sorry I don’t have pictures of this step but Nick was out of town when I put these up.

Here is a picture that hopefully explains how I put the shade up.

The silver base, light bulb, the rod, and the cap were all left over from the ‘boob’ light. I added the washer to hold the nuts up because if I didn’t add the nuts, the shade would not be flush with the silver base. I had to add the nuts to bring the shade up closer to the ceiling. After I added the washer and the nuts I just caped off the rod with the round cap that kept the original glass cover on.

Here is a picture of the original light with the round cap.

Sorry if those instructions were hard to follow, just ask if you need clarification!

Here’s what they looked like all light up.

After adding the 3 new drum shades, our hallway was finally complete and I love it!!

What do you think?!?!

Hallway Update

This weekend I made it my priority to complete some more projects in our newly striped hallway.

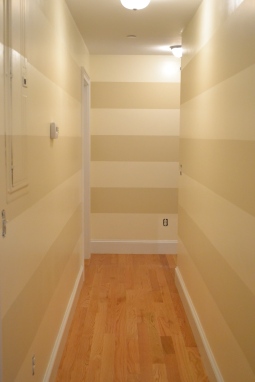
I have been looking for a console table that would fit at the end of the hallway to display some books and other decorative things. The problem was that the table could only be 12″ deep because I didn’t want the table sticking out past the door frame. The table was going to be right outside the guest room door so I didn’t want anyone to run into the table once they walked outside the room.

Here are some before pictures:

 When I started to look for console tables for the end of the hallway, I only found a few that were the right depth. The few that I found where either not the style or color I was looking for or more than $100 which was way out of our budget. I didn’t want to spend too much money since it was more for decoration than function.

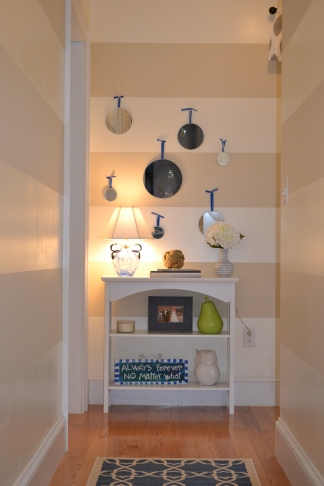
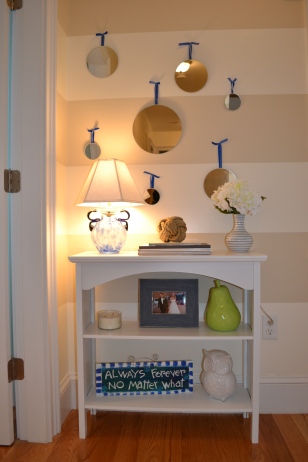
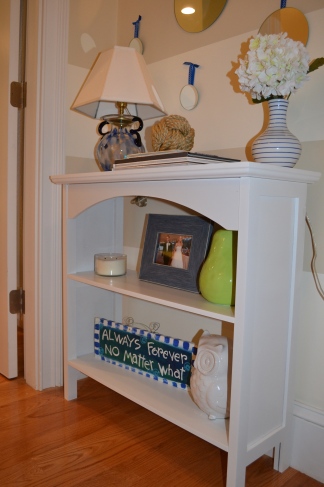
So when we went to the Christmas Tree Shop this weekend and found a bookcase that met our dimensions at only $35, I was sold! I wanted it to look more like a console table so I just made sure Nick didn’t add the back panels so it was more open.

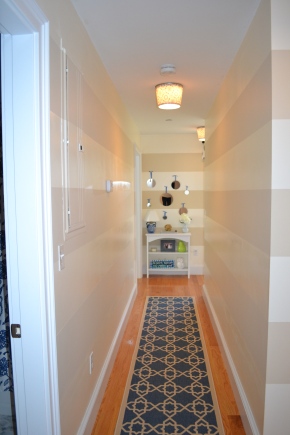
I also wanted to add some mirrors above the table to create the illusion that the hallway is longer. I bought a pack of 7 circle mirrors from target and bought some blue ribbon to use to hang the mirrors.

I also bought a runner from Overstock to give the hallway some more softness.

Here are the after pictures:


We also made a trip to Homegoods and got the pear, owl and the picture frame. The blue and green sign we got in Cape Coral, Florida last year at a fun art shop. The nautical knot and striped vase are from Target and the blown glass light was an engagement gift from my aunt.

I am so happy with the way it all turned out. The last thing I need to do is update the lights in the hallway and then this hallway will be done. I cannot even wait for that day! This has been a long process for such a small hallway!!

Hope you like it as much as we do!

The longest stripe project EVER!!

Some projects just take WAYYYYY longer than expected and this is definitely one of them! It all started when I decided I wanted to paint our second floor hallway with stripes. Stripes are a great way to instantly change the look of a room and they also make hallways look longer and larger.

The hallway that connects our master bedroom to the guest bathroom and bedroom was boring and dark and needed a makeover. On top of that we had our electrical panel in the hallway which was dark grey and stuck out like a sore thumb.
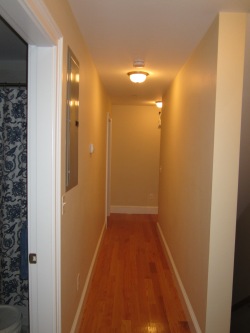
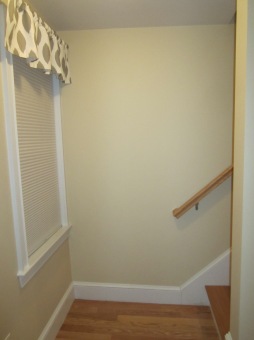
 The idea around the whole project was to keep the original paint color (Barely Beige by Benjamin Moore) but add in some soft white stripes (Moonlight White by Behr). I decided to keep the beige because the hallway connects all 3 floors which has the same beige color. I thought it would break up the open floor concept of our condo if we had two different color stripes just in that hallway.

Since I knew we were going to keep the same color, I thought this project would only take a few days. I was planning on just taping off where the white stripes needed to be painted and then after adding two coats of white paint the project would be finished but boy was I wrong…

The first night we started taping off the stripes with painter’s tape, we realized all the original paint was ripping off with the tape.
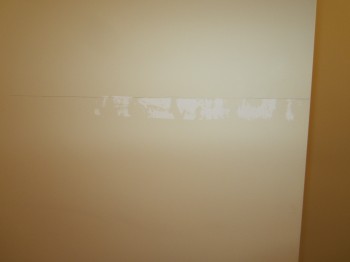
We are still not sure why this happened but we think when the painters came in and painted our condo, they used a spray gun and just lightly sprayed on one thin coat. That would explain why the paint was coming up with the tape.

After doing some research and talking to some friends, I decided to paint the whole hallway with the white paint and start all over. I was hoping by repainting the walls I would put a good coat on and therefore allow the painters tape to work.

However, the re-painting was not as easy as I thought it would be. I had never painted a room before so I had a lot to learn. I started by using a trim brush to trim the whole hallway since I couldn’t use painters tape to frame out the walls.


That took two nights after work because it was such tedious work. I then waited until the next weekend to use the roller to fill in the rest of the walls. But ofcourse that also did not go well. Being a novice painter, I wasn’t aware of how much paint to put on the roller so after two coats and a long day the hallway was not looking good. The paint was thicker in some areas and thin in others and it was noticeable (you can see darker patches on the right wall below).
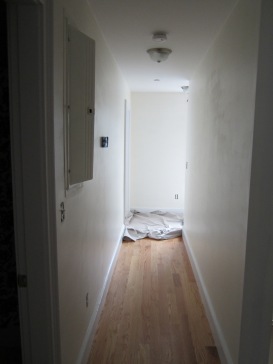
At this point it had been over 2 weeks that I had started this project (I worked slowly due to work and other commitments). I was so frustrated because I didn’t know what I was doing wrong and I honestly almost gave up. But I am not a quitter and once I get my mind set on something nothing can stop me so I called one of Nick’s friends that does a lot of painting and got some tips.

A few days later I went out and bought another can of paint (I had already used up the first can with my horrible paint job) and I painted the hallway one last thick coat and it was looking great! It’s hard to tell in the picture because of the horrible lighting but it looked even and much better.
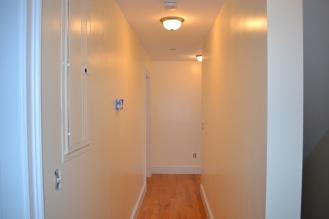
After that last coat I let the paint dry for a full week before I used painters tape on it. I wanted to make sure I gave it as much time as possible because I didn’t know what I would do if the paint came up with the tape again…

I then spent two nights measuring and taping off the stripes. This was another tedious job because I had to make sure the stripes were level and all the same width. I used a yard stick and level and smaller pieces of tape to tape off the stripes. I also went to a local paint store to buy Scotch Blue Painters Tape for Delicate walls… I didn’t want to chance it with regular painters tape.

When I was finished with my last piece of tape, Nick helped me seal the tape with a coat of the white paint which helped create a more crisp line in the end. We basically just lightly painted the tape with the white paint so that the tape would be sealed to the wall and if the paint leaked through, it was the same color as the wall so it wouldn’t matter. If we didn’t seal the tape, the beige paint could have seeped through the tape when we were painting the stripes on.
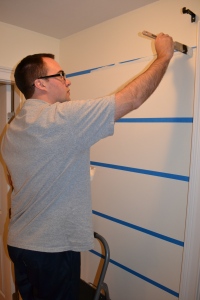
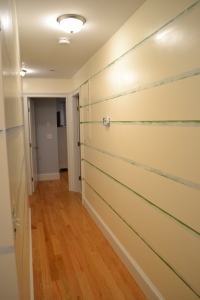
As you can see from the right wall in picture above, we ended up running out of the delicate painters tape and had to switch to frog tape. But thankfully, it worked and none of the paint was ripped up!

After letting that dry for a night we used the roller to paint on the beige stripes.
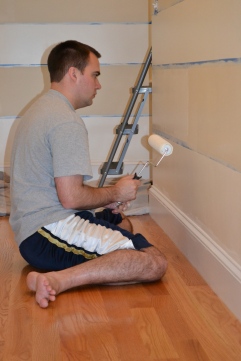
 This was my favorite night of the whole (almost) 4 week project because as soon as the second coat was added, we could rip off the tape to see the stripes!

It was at this moment that I knew all my hard work had paid off!
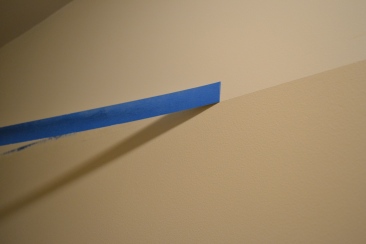
And finally some pictures of the finished hallway.

Below is the hallway looking from the master bedroom to the guest bedroom. And now the electrical panel blends right in with the rest of the hallway.

Below is the wall when you come up the stairs from our first floor living room/kitchen. That door has our stackable washer/dryer in it.
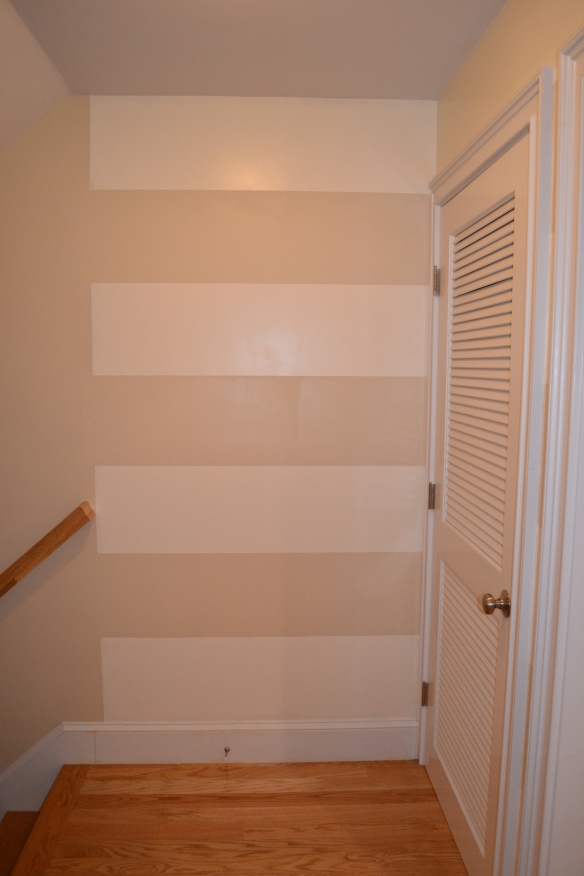
And here is the wall that leads up to the 3rd floor media room.
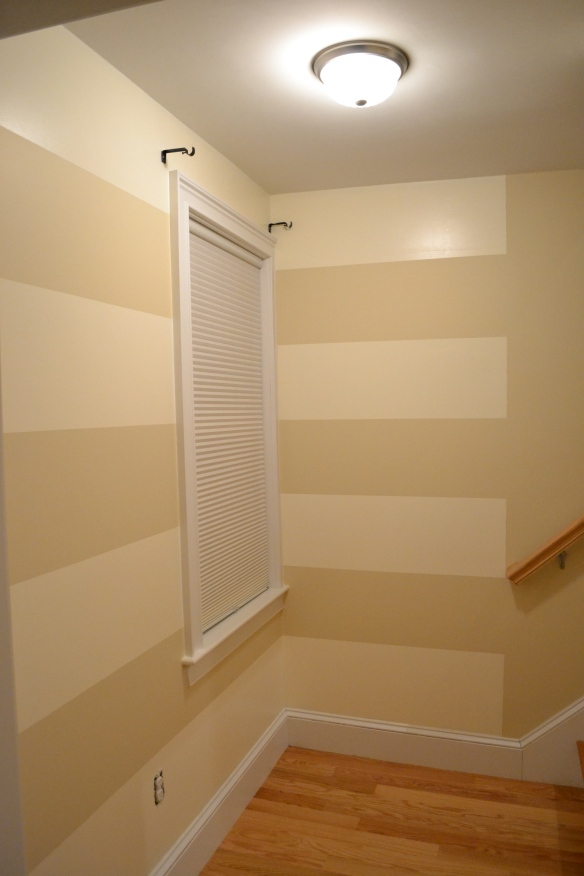
I still have some more things to do in the hallway but for now, I am just loving all my hard work.

Be back at some point with more updates and projects that I am doing for this hallway.

What do you guys think? Was it worth all my hard work and time?